Connect with OpenAI
Connect with OpenAI
Get up and running with Rapid MCP and build your first MCP tool with a weather API
This guide will walk you through setting up a working example of RapidMCP with OpenAI's platform. You'll learn how to connect an MCP server to an AI Agent to get real-time weather information.
Prerequisites
- An OpenAI account with access to AI Agents
- A RapidMCP account
- Basic familiarity with OpenAI's platform
Navigate to OpenAI's AI Agent Editor
First, go to the OpenAI platform to create a new AI Agent:
- Open your browser and navigate to https://platform.openai.com/chat/edit
- Sign in to your OpenAI account if you haven't already
- You'll see the AI Agent creation interface where you can start building your custom assistant
Copy Your RapidMCP Server URL
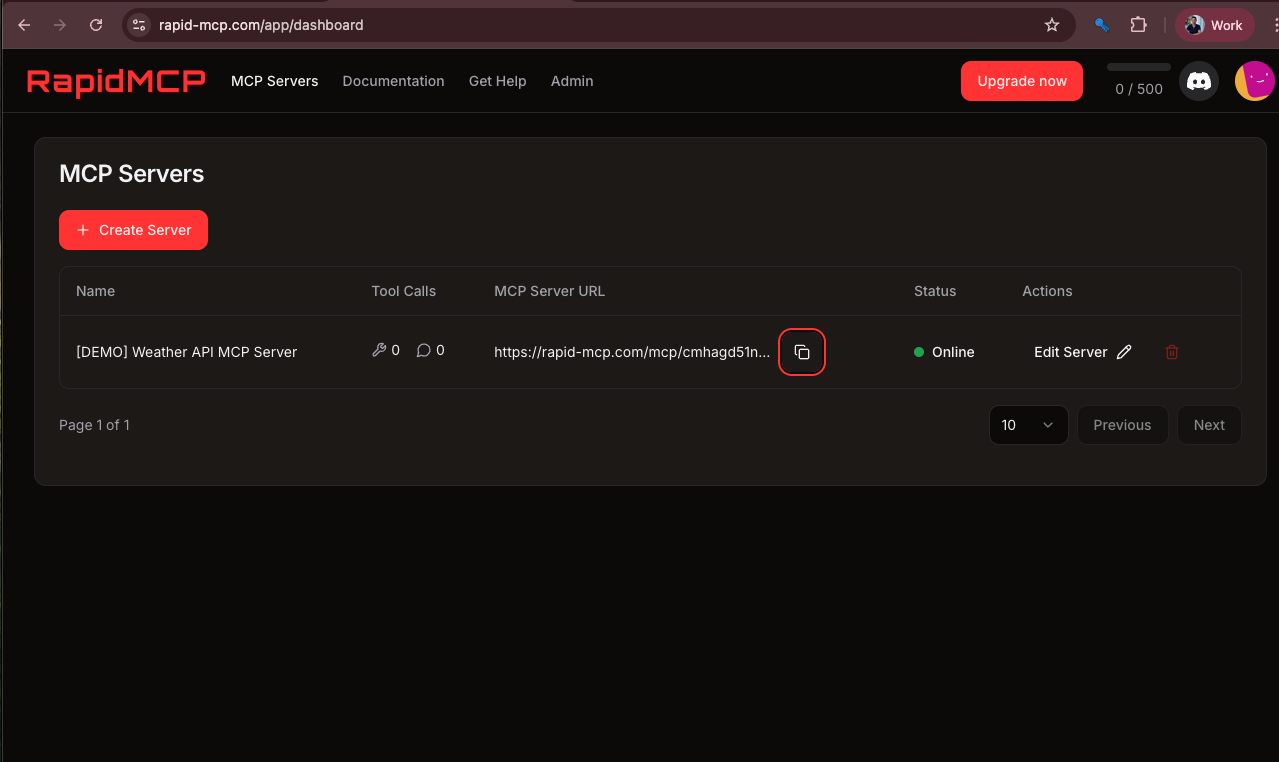
Now you need to get your MCP server URL from RapidMCP:
- Log into your RapidMCP dashboard
- Navigate to your project or create a new one
- Find the server URL in your project settings
- Copy the complete URL (it should look something like
https://rapidmcp.com/mcp/<serverId>/stream)
Option 1: Use our predefined demo weather server
- We've created a ready-to-use weather MCP server for this example
- Simply use the demo server URL provided in your RapidMCP dashboard
Option 2: Build your own server
- Create a new MCP server in RapidMCP
- Configure it with your API endpoints
Add MCP Server Details to OpenAI
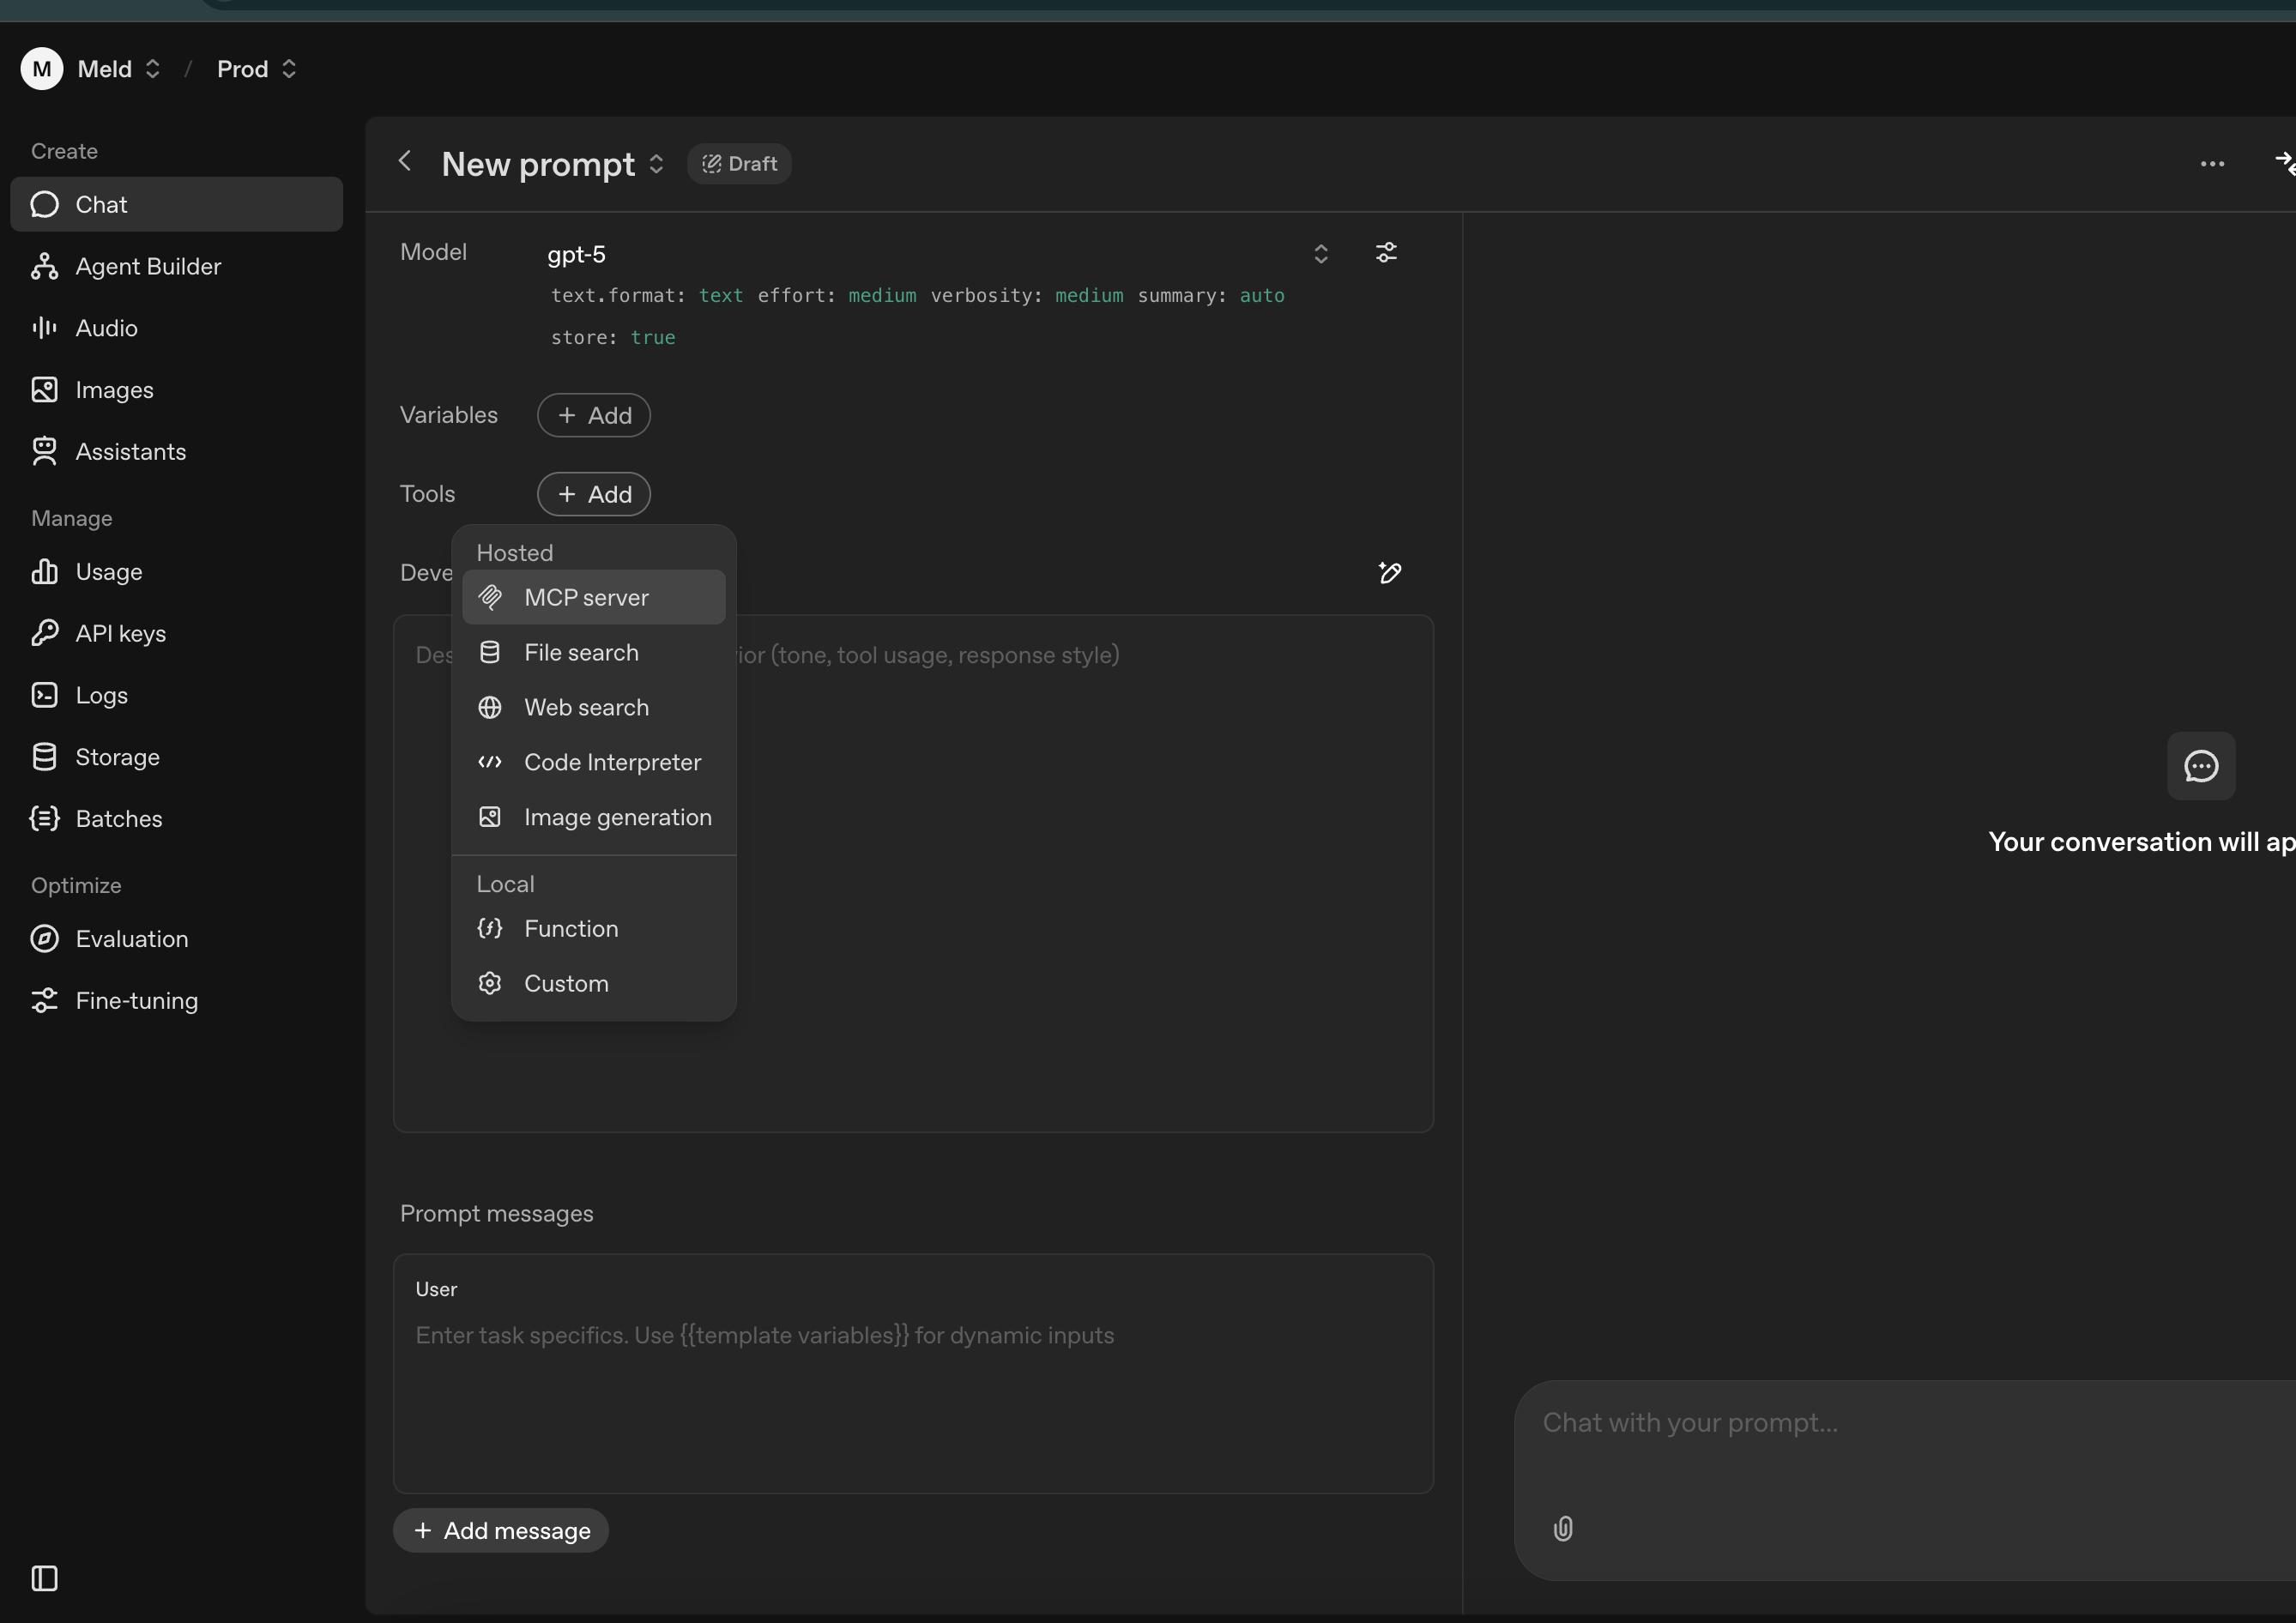
Back in the OpenAI AI Agent editor, you'll configure the MCP server:
- In the AI Agent editor, look for the "Actions" or "Tools" section
- Click on "Add Custom MCP Server" or "Create MCP Server"
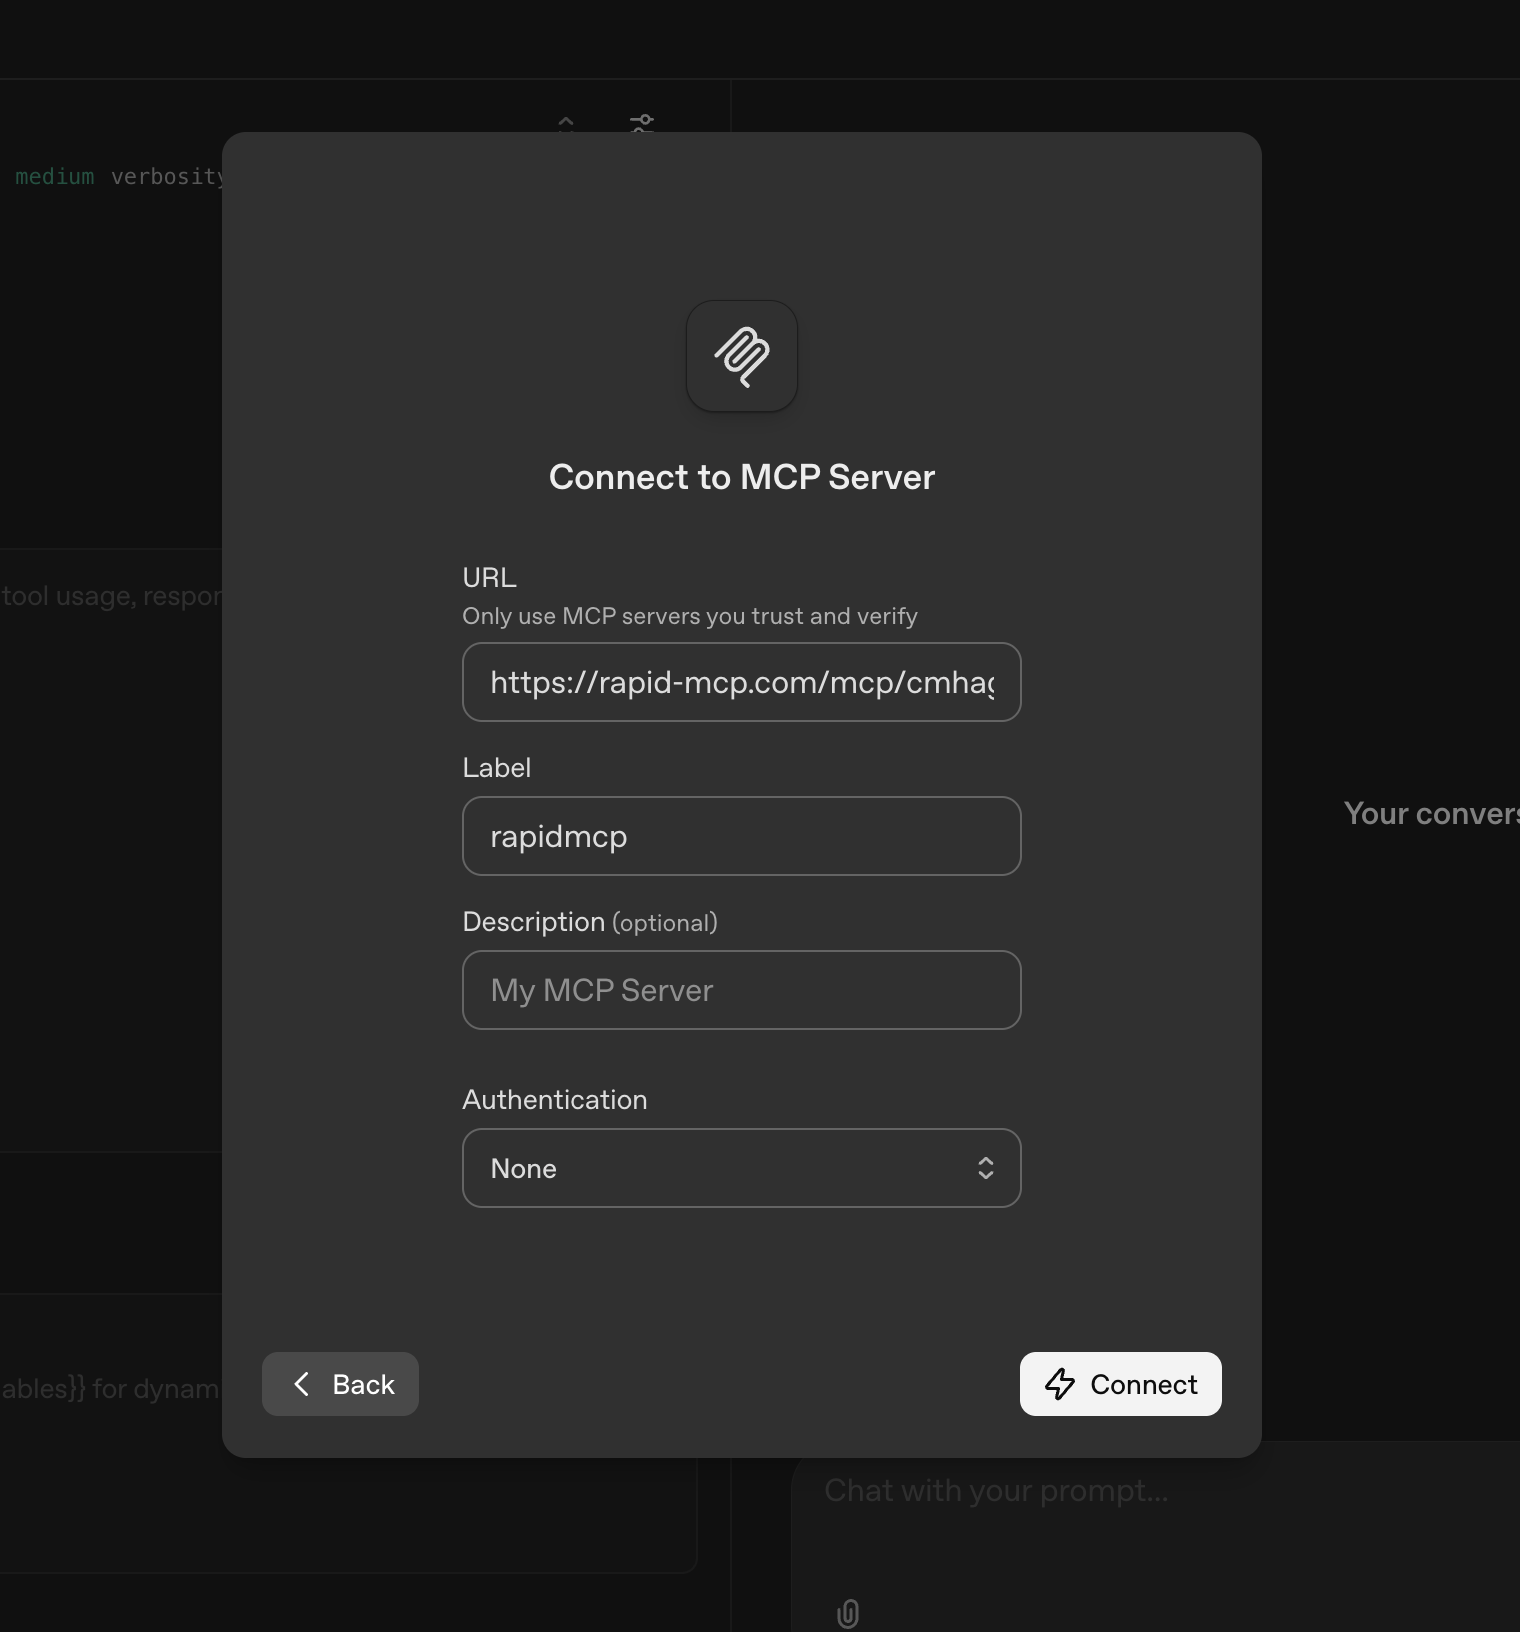
- Paste the RapidMCP server URL you copied in the previous step
- Configure any additional settings as needed (set Authentication to "None" for now)
- Save the configuration
Test Your Integration
Now it's time to test your MCP integration:
- Start a new conversation with your AI Agent
- Ask it to get weather information for a specific location
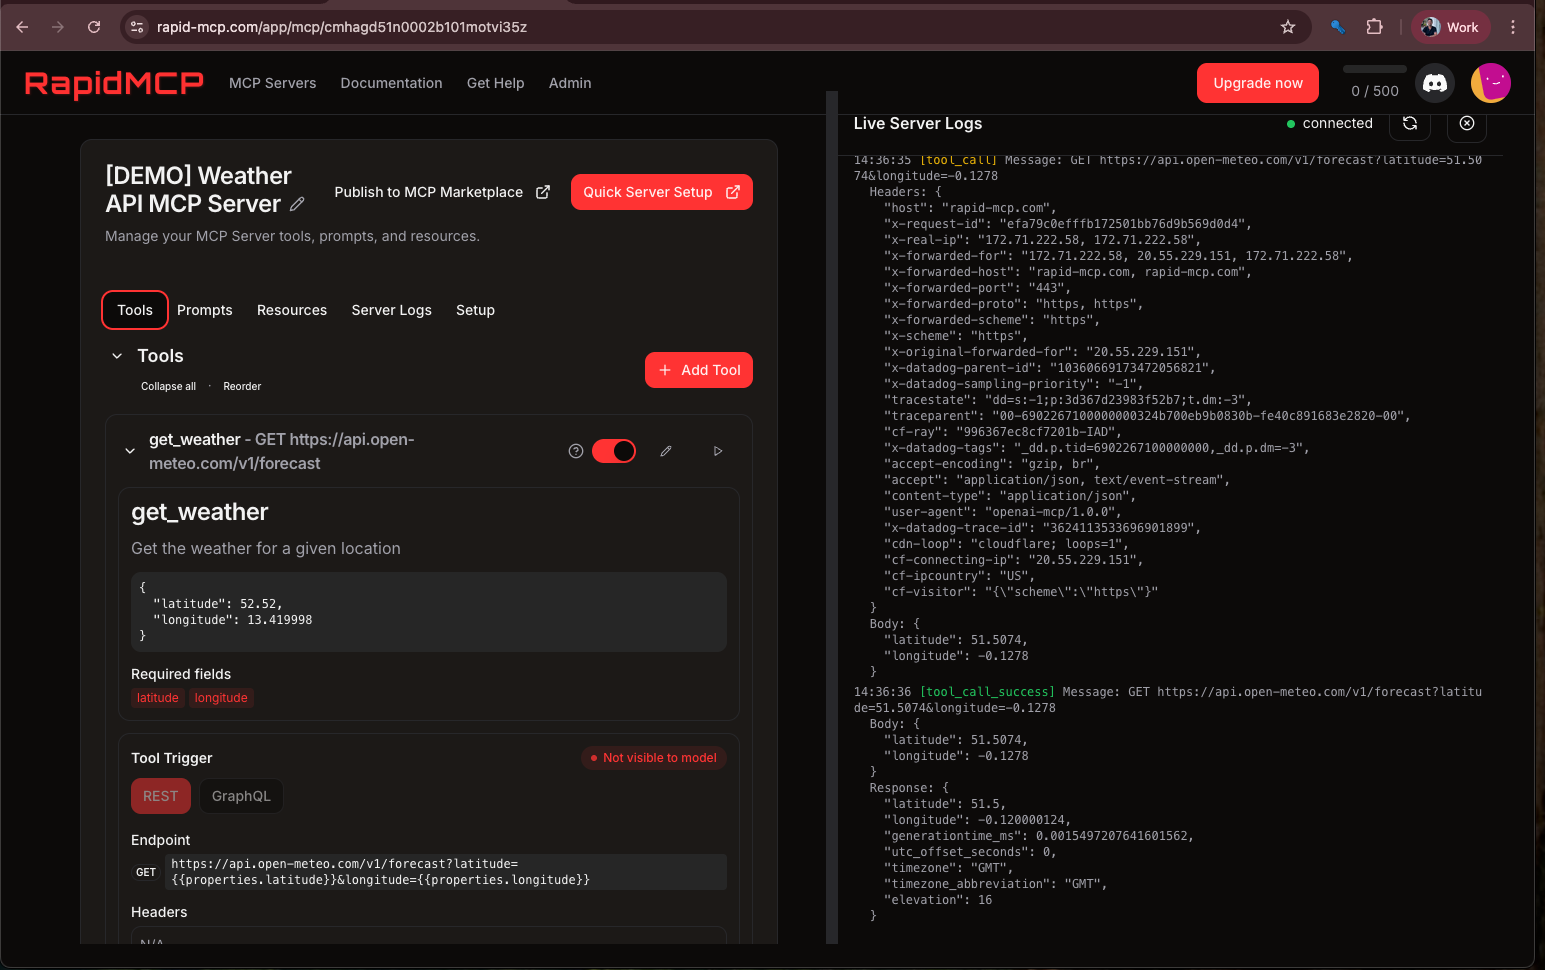
Hey bot, what's the weather in Tokyo?- The AI Agent will approximate the latitude and longitude to call the tool to get precise weather for that location.
- Try different locations and weather queries to verify everything is working.
A key insight is when the model generated the latitude and longitude values for "Tokyo" to call the MCP tool. The model can generate values for your tool call arguments which you can define in RapidMCP.

Monitor and Debug
Keep an eye on your MCP server logs to ensure everything is working correctly:
- Go back to your RapidMCP dashboard
- Navigate to the logs or monitoring section
- You should see API calls being made when you interact with your AI Agent
- Check for any errors or issues that might need attention
What You've Accomplished
Congratulations! You've successfully:
- Created an AI Agent in OpenAI
- Connected it to your RapidMCP weather API (using either the demo server or your own)
- Tested the integration with real weather queries
- Set up monitoring to track API usage
Next Steps
Now that you have a working example, you can:
- Customize the weather API responses
- Add more MCP tools to your server
- Create additional AI Agents with different capabilities
- Share your MCP Server with others or publish it to the MCP Server store
Troubleshooting
If you encounter any issues:
- Connection Problems: Double-check that your RapidMCP server URL is correct and accessible
- No Responses: Check the RapidMCP logs to see if requests are being received
- Rate Limiting: Monitor your API usage to stay within limits
For more detailed troubleshooting, refer to the RapidMCP documentation or contact support.